
Achieve the Perfect 90's Makeup Look
- Avril Rodriguez
- Jun 19, 2023
- 5 min read

In 2023, there has been a resurgence of the 90's and its simple outfits and bold makeup. Makeup artists like Kevyn Aucoin and Stylists like Patricia Field brought new takes to Hollywood's beauty standards. Bright yet berry lips and simple smoky eyes was the go to look for any event or photoshoot.
From stars such as Cindy Crawford to Cameron Diaz these ladies were the IT girls of their times, influencing fashion trends and beauty routines.
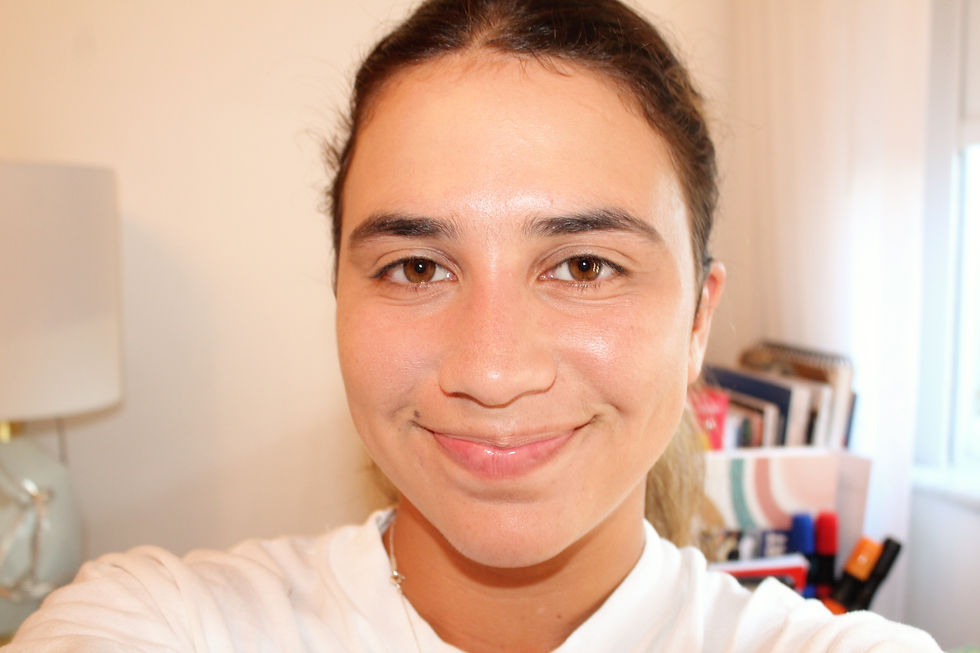
If you want to learn how to achieve the perfect 90's inspired makeup look here is a step-by-step process to getting the perfect face, eyes, and lips combo on real skin with no touch-ups or filters.
In the photographs: Cindy Crawford and Cameron Diaz
Base
Start the look with a light base. Use a foundation or skin tint that gives light to medium coverage. When using the product make sure it matches your skin tone so it doesn't look uneven in comparison to the rest of your body. If using a liquid base for your face, I recommend starting with a compact rounded brush and working the product in to blend smoothly. To give your skin an airbrushed finish go in with a blending sponge and tap the product lightly into your skin until your skin tone is completely evened out.
1. Bronze
Contour did not become very popular until the 2010's, but bronzing has been around for much longer. Contour and bronzer can be confused on where to be placed, but don't fret I'm here to help explain. Start off by taking your preferred bronzer and a fluffy angled brush. Once you have placed product on your brush, rather than blending in the product with swift back and forth motions, apply the bronzer with light tapping motions from the start of your cheekbone towards the end of your cheekbone. This will allow you to haver more control over where the powder is applied, unless you choose to work with a cream bronzer which in that case you may use your fingers to blend in, a fluffy angled brush, or a beauty sponge.
When adding bronzer, I like to think of it as a three (demonstrated in illustration below). Start off on the cheekbones and work up towards the forehead and below towards the jawline.

2. Blush
Popular blush shades used in the 90's had very purple and peach under tones, so make sure to grab a blush with either of those tones. To start off, I used a fluffy angled brush to help structure where I wanted to place the brush. During this period, blush was most frequently applied in the apples of the cheeks.
Using a cream blush, apply the product in a half circle from your cheeks and go up towards the cheek bone (detailed in the illustration below). Once the cream blush has been applied, it's time to blend. Using the fluffy angled brush, start creating upwards motions with the brush in order to smoothly blend the product from the apples of your cheeks to the highest point of your cheekbone. When doing this, make sure to have most of the blush concentrated along the fullest part of your cheek (seen in the image below).


3. Eyes

1.Crease
To start off the eye look take a light brown shade from your eye shadow palette and have in hand a small defining blending brush. Using the brush, apply the eyeshadow along the crease and blend it out using small circular motions to ensure it doesn't blend high up into the brow bone.
I also used a pinkish nude shade very minimally to give the look some color.


2.Lid
After applying a light brown shade to the crease and blending it out with a small defining blending brush, take a dark brown shade and with a compact packing brush pat the color all over the lid. Make sure to not go past the crease and definitely do not go past the brow bone.


Once you have packed the color onto your lid, go ahead and take a small defining blending brush and make sure to blend both the light brown shade and dark brown shade together to make a seamless blended look.
To really give it that 90's look, make sure to use matte eyeshadows and avoid using shimmery shades. Lastly, for this step, take the same dark brown shade you used for your lid and take a small blending brush. With the brush, you are going to lightly apply the dark brown shade to your under eye near the waterline of your eye, making sure to keep the color close to your eye in order to keep the under eye area light.


3.Under Eye


After completing eye steps 1 and 2, it's time to line your waterline. Taking a brown pencil or cream eyeliner, line your bottom waterline on both eyes. If you'd like, you can also use the brown eyeliner on your undereye (lightly apply) and then use a smudge brush to briefly blend it out to make the look "smokier."
If you don't have a brown eyeliner, you can opt for a black one.
4. Eyeliner


Lastly, take a black cream eye pencil and smudge it towards the outer corner of your lid, almost as if you were applying eyeliner.
At first, it will not look very nice, but once you take a smudge brush and blend it out towards the lid it will look much better. I used my index finger to continue blending the product and working it into my lid, being that it was much easier to disperse the product.

5. Lips
The final touch to the look is lips. First, take a brown lip liner and line the outermost part of your lips. You can use your finger to diffuse the liner into your lips so it can appear more subtly (or not, however you prefer). Second, take a berry-toned lip color and apply it to your lips. I like using a small brush to apply my lipstick, but you can apply it straight from the tube.

6. Final Look
Eyes:


Face:


Exceptions
To make your makeup last all day, I recommend applying setting spray before adding your lipstick.
For this look I did not use mascara, but if you would like to here are some of my recommendations.
Products Used

JESAAELYS Beauty
Perfect Smudge Brush
$9.99

JESAAELYS Beauty
Defining Blending Brush
$9.99

JESAAELYS Beauty
Flat Packing Brush
$9.99

JESAAELYS Beauty
Fluffy Angled Brush
$14.99

JESAAELYS Beauty
Smooth Foundation Brush
$14.99
Photography: Avril Rodriguez
All designs owned by TPL
For more articles like this follow us on:
Tik Tok: @thepurelifemagazine
Instagram: @thepurelifemag
Pinterest: @thepurelifemag
Subscribe to our newsletter to receive tip, tricks, and how-tos on everything fashion, beauty, lifestyle and more!


style isn’t just about the products you use; it’s about carrying yourself with confidence and embracing your unique personality. That’s why I appreciate METHRA’s approach to fragrance so much. Just as the right makeup enhances your presence, a METHRA perfume is crafted with precision to inspire confidence and reflect individuality.